How to Sharpen a Chainsaw Chain: A Complete Guide for Beginners
🌲 Why a Sharp Chainsaw Matters
A chainsaw is one of the most powerful and useful tools around a home, garden, or small farm — but only if it’s sharp.
A dull chain makes cutting slow and frustrating, increases the risk of accidents, and can even damage your saw.
When the teeth are sharp, the saw almost seems to glide through wood. When dull, it starts to bounce, smoke, or pull unevenly. Learning how to sharpen a chainsaw chain isn’t complicated, and with a little patience, you can save money, improve safety, and keep your saw ready for any job.
⚙️ Understanding Your Chainsaw Chain
Before you sharpen, it helps to know what you’re working with. A typical chainsaw chain has three key parts:
- Cutters (teeth): These do the actual cutting. Each has a sharp edge and a small curved depth gauge (raker) in front.
- Drive links: These fit into the chainsaw bar groove and help move the chain.
- Tie straps: They connect the teeth and drive links.
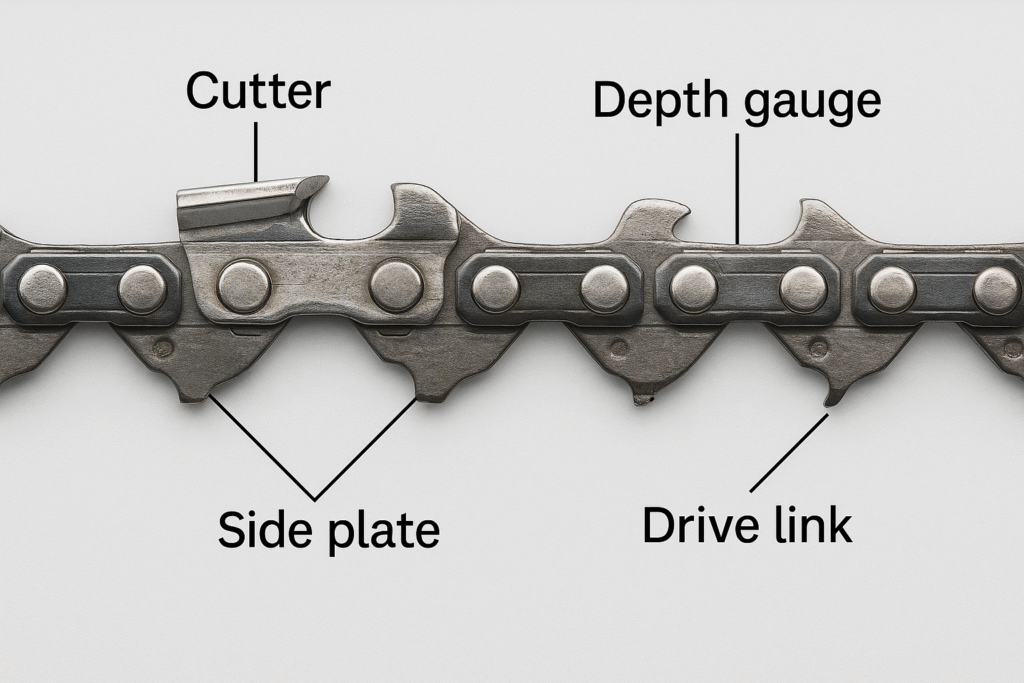
Each cutter has two edges:
- The top plate — the flat, angled surface that slices the wood.
- The side plate — the vertical surface that forms the cutting corner.
When sharpening, you’re restoring those edges to their original angle so the chain can slice cleanly again.
🔎 Signs That Your Chainsaw Chain Needs Sharpening
You don’t need to guess when to sharpen — your chainsaw gives clear signals:
- You need to press down harder to make a cut.
- Fine dust instead of wood chips comes out.
- Smoke appears even though the chain oil is fine.
- Cuts pull to one side, meaning unevenly sharpened teeth.
- Vibration increases, making the saw harder to control.
- The saw jumps or bounces at the start of a cut.
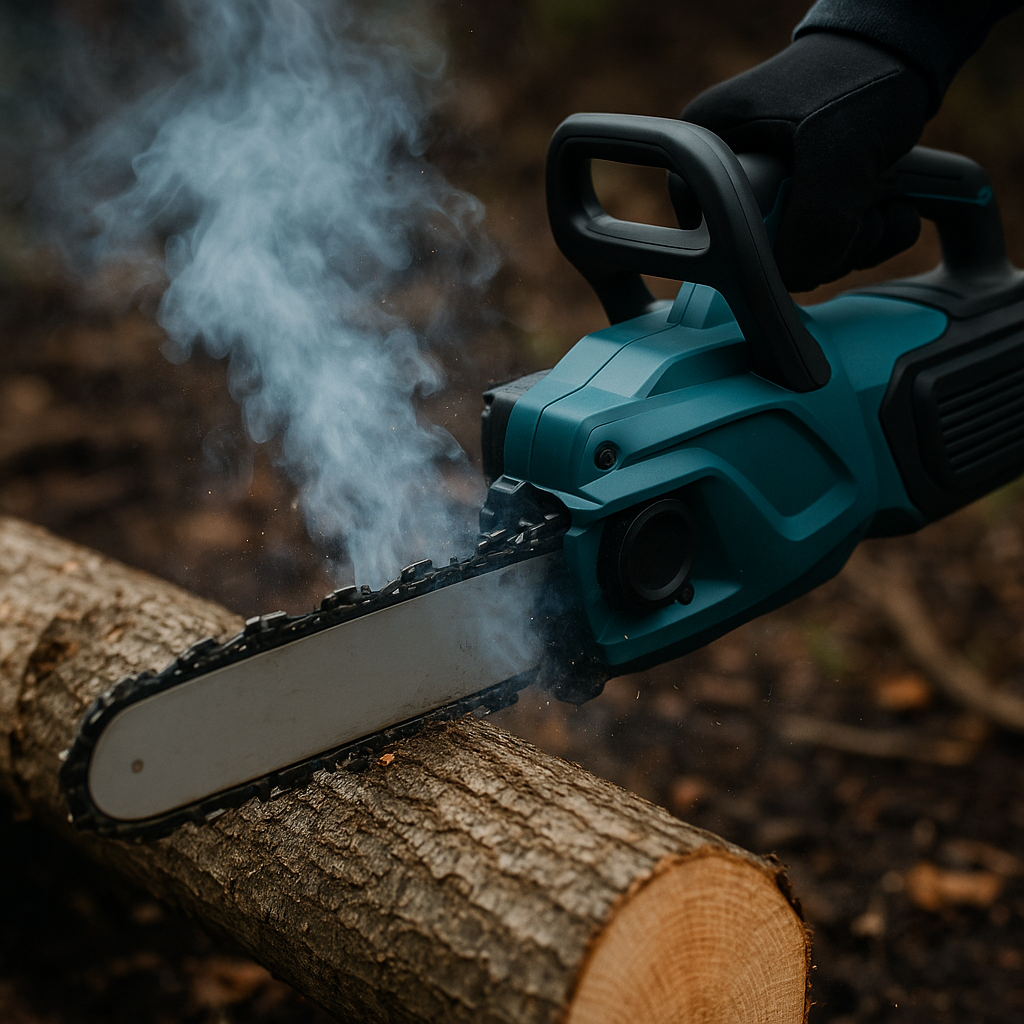
If you notice any of these, stop and sharpen before continuing. Regular touch-ups take minutes and prevent heavy grinding later.
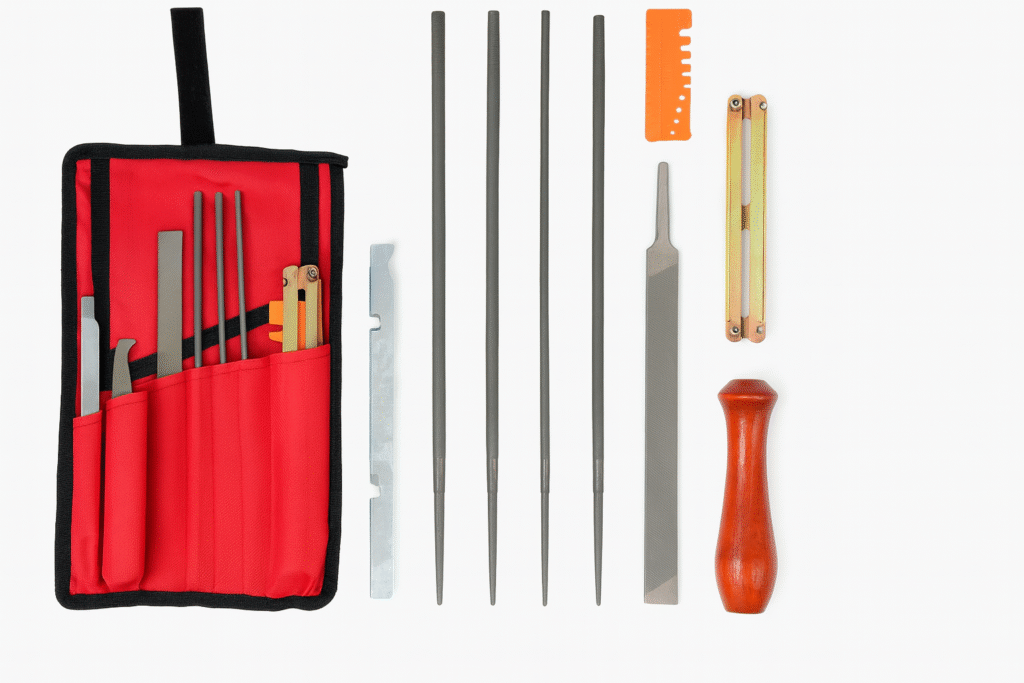
🧰 What You’ll Need to Sharpen a Chainsaw Chain
You can sharpen by hand or use an electric sharpener, but for beginners, hand-filing is safest and easiest to learn.
Basic Tools:
- Round file that matches your chain’s pitch (most are 4mm, 4.5mm, or 5.5mm).
- File guide to keep the angle consistent.
- Flat file to adjust depth gauges.
- Depth gauge guide (raker gauge) to set raker height.
- Vise or clamp to hold the bar steady.
- Work gloves and eye protection.
📘 Tip: You can find your chain’s pitch and file size stamped on the guide bar or chain packaging.
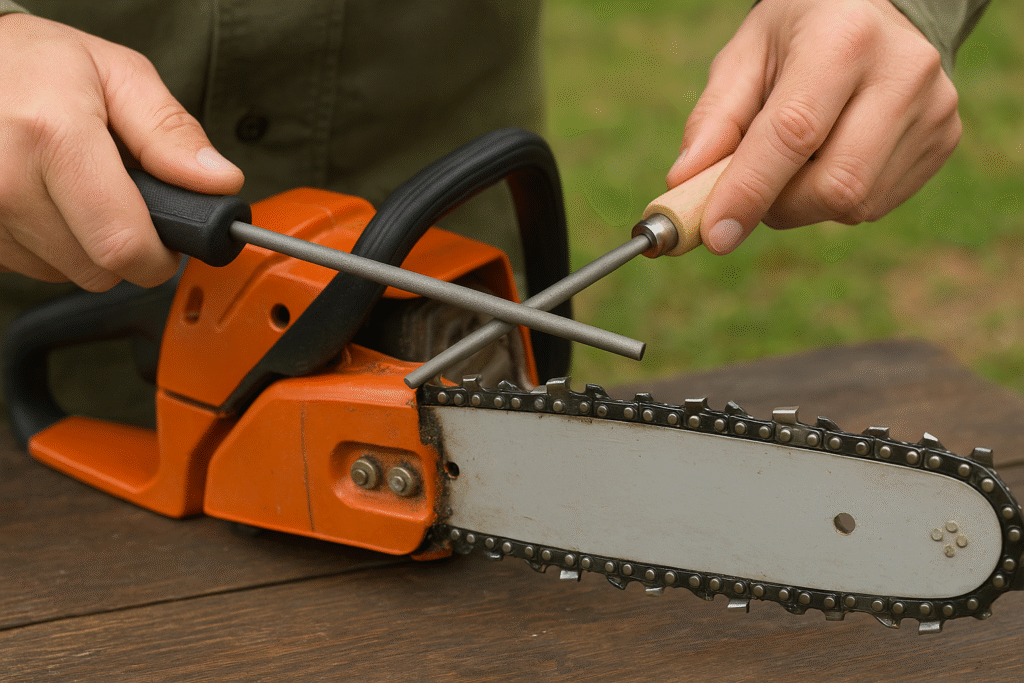
🪚 Step-by-Step: How to Sharpen a Chainsaw Chain by Hand
Follow these steps carefully and you’ll get a sharp, balanced chain every time.
1. Secure Your Chainsaw
Place the chainsaw on a stable surface. Clamp the bar in a vise if you have one — it keeps things steady and prevents accidents.
Make sure the chain brake is off, so you can rotate the chain freely by hand.
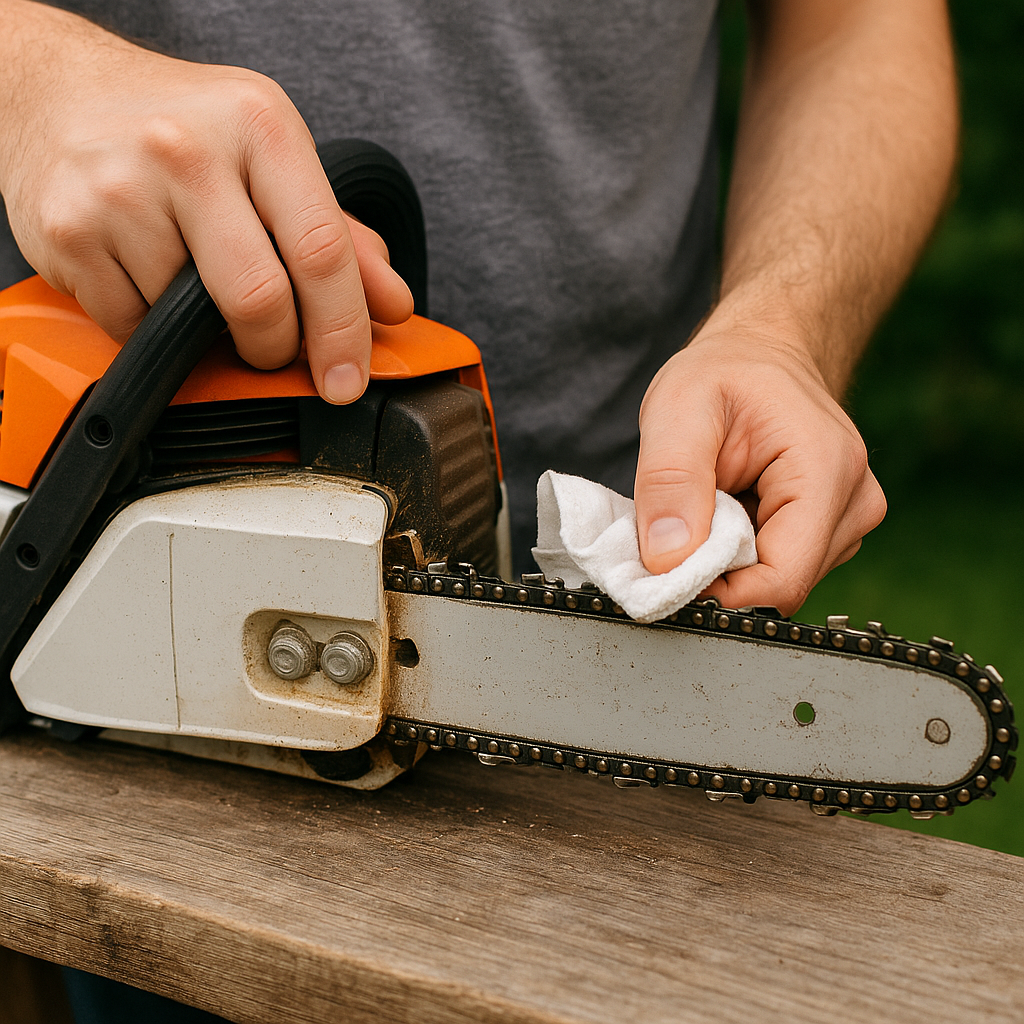
2. Clean the Chain
Use a brush or compressed air to remove sawdust, sap, and oil. A clean chain helps you see the cutters clearly and ensures an even sharpening job.
3. Find the Shortest Cutter
Every chain has one cutter slightly shorter than the rest. That’s your reference — file all other teeth to match this length so the chain cuts evenly.
4. Position the File Guide
Place the round file in the guide and set it across the tooth you’ll sharpen first.
The guide keeps the file at the correct angle (usually 25° or 30°) and depth.
Check your chainsaw’s manual or chain packaging to confirm the correct angle.
5. Sharpen the First Tooth
Push the file away from you smoothly through the cutter.
- Only file in one direction — don’t saw back and forth.
- Use light, even pressure.
- After each stroke, lift the file on the return.
Usually, 5–8 strokes are enough per tooth, but it depends on how dull the chain is.
🪵 Tip: Count your strokes so each tooth gets the same number for an even cut.
6. Work Around One Side
Continue sharpening every second tooth (they alternate left and right). Keep your strokes consistent and check your angle often.
Once you finish one side, rotate the saw (or walk around) and sharpen the teeth that face the opposite direction.
7. File the Depth Gauges
After sharpening all cutters, check the rakers (depth gauges). These control how deep each tooth bites into the wood.
Use your raker gauge to check the height. If a gauge sticks up, file it down with a flat file until it’s level with the tool.
Do not over-file — that makes the saw aggressive and harder to control.
8. Check Your Work
When done, run your fingers lightly along the chain (with gloves). The cutters should feel sharp and uniform.
Spin the chain by hand to make sure it moves freely and smoothly.
Finally, apply a few drops of bar and chain oil before starting up.
🪵 Sharpening with an Electric Grinder (Optional)
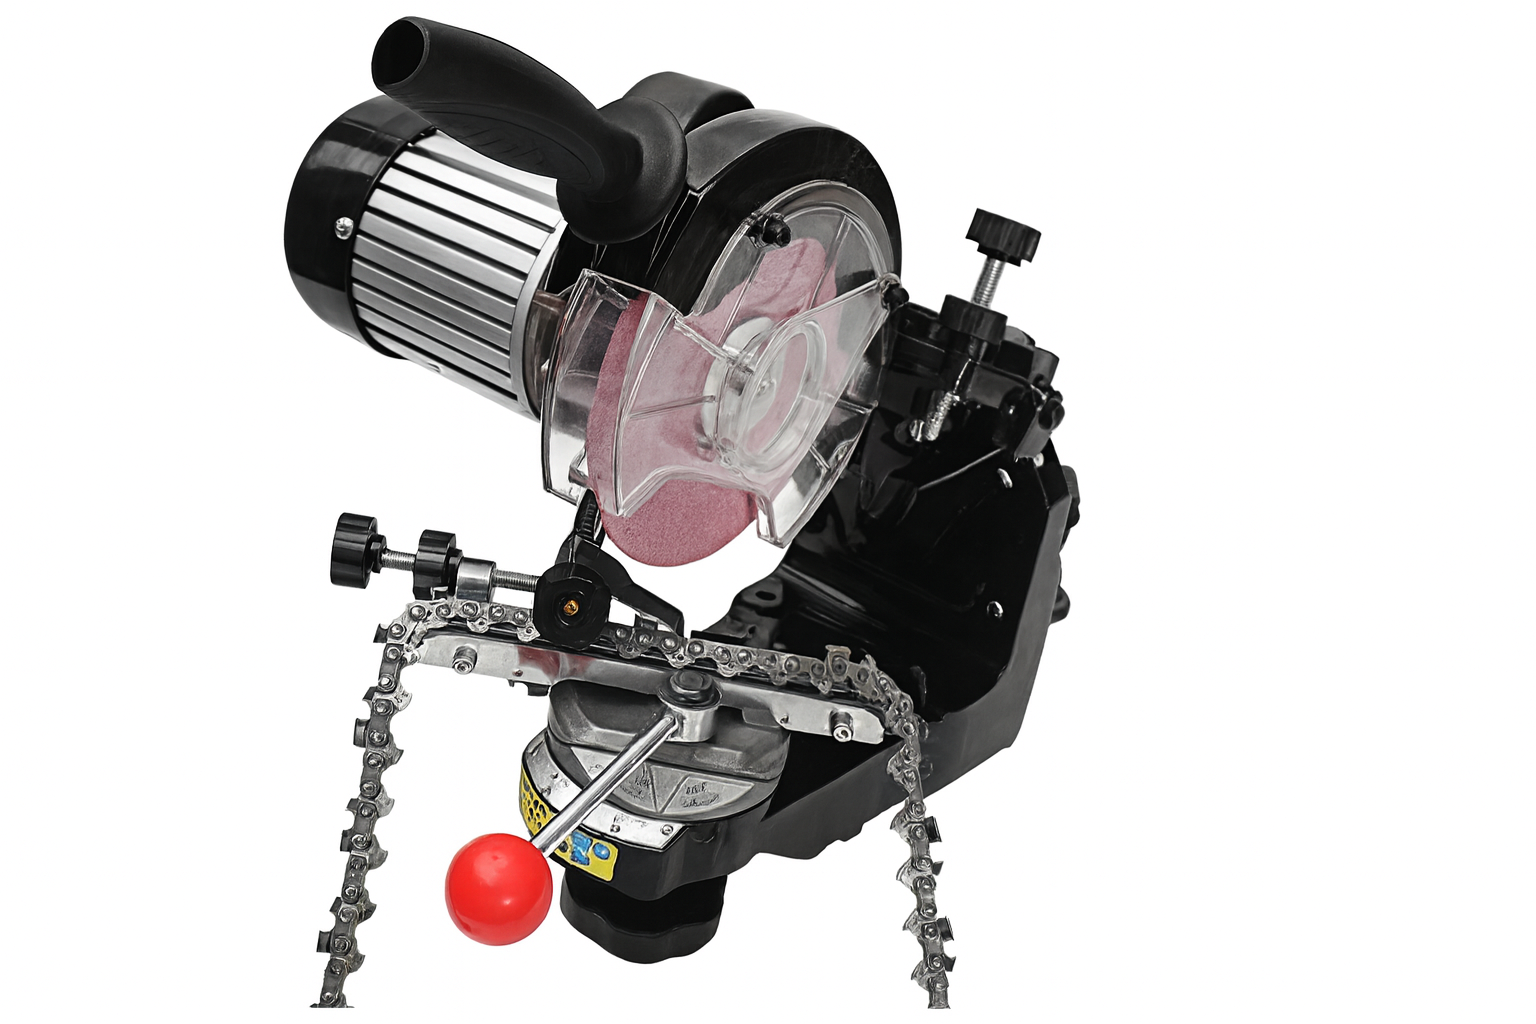
If you often cut firewood or manage multiple saws, an electric bench sharpener can save time. It works like a mini bench grinder, setting the correct angle automatically.
Advantages:
- Precise, uniform sharpening
- Faster for multiple chains
- Easy to set angles for different chain types
Drawbacks:
- Higher cost
- Slightly more complex setup
- Can remove too much metal if overused
For beginners, start with hand filing until you understand how the chain feels when it’s properly sharpened.
⚠️ Common Mistakes to Avoid
Even experienced users make sharpening errors. Here are the big ones to watch for:
- Wrong file size: Leads to uneven teeth and poor cutting.
- Inconsistent angle: Makes the saw cut sideways.
- Uneven pressure: Some teeth sharper than others → rough cutting.
- Over-filing the rakers: Chain becomes aggressive and risky.
- Filing too deep into the tooth: Reduces chain life.
- Forgetting safety gear: Flying filings and slips can cause injury.
Always take your time — sharpening is about precision, not speed.
🧭 How Often Should You Sharpen a Chainsaw Chain?
It depends on how and what you cut.
- Every time you refuel — professionals often touch up the chain lightly each time.
- After hitting dirt, nails, or rocks — sharpen immediately.
- When chips turn to dust — that’s your visual cue.
Frequent light touch-ups are better than waiting until it’s dull. You’ll save the chain and make your saw safer.
🧤 Safety Tips While Sharpening
Even though the saw is off, always treat it as sharp equipment.

- Wear cut-resistant gloves and safety glasses.
- Ensure the chain is cool and clean.
- Never file with the saw running.
- Don’t work in poor light or cluttered spaces.
- Re-tension the chain properly after sharpening.
A sharp, well-tensioned chain not only cuts faster — it also dramatically reduces kickback risk.
🌿 Maintaining Your Chainsaw Chain Between Sharpenings
Regular sharpening is part of overall maintenance. To extend your chain’s life:

- Keep it lubricated: Always check oil flow before cutting.
- Avoid cutting into the ground: Dirt dulls teeth instantly.
- Use correct chain tension: Too tight → wear; too loose → danger.
- Flip your bar occasionally: It evens out wear.
- Clean after use: Remove sawdust, resin, and debris.
A bit of routine care saves you money and frustration later.
🪵 Understanding Filing Angles and Depths (for the Curious)
If you want to dive deeper, here’s what’s happening when you file:
- Filing angle: Usually 25°–35° for cross-cutting wood. A steeper angle gives faster, rougher cuts; a shallower one gives smoother, slower cuts.
- Top plate angle: 60°–80° from horizontal.
- Depth gauge setting: 0.025 inch (0.65 mm) for most chains.
Your file guide is designed to help maintain these automatically — that’s why it’s worth using every time.
🔧 When to Replace Instead of Sharpen
Even a well-maintained chain wears out eventually. Replace it if:
- Teeth are less than 4 mm long.
- Cracks or chips appear in the cutters.
- Drive links are bent or damaged.
- The chain keeps dulling quickly even after sharpening.
It’s also wise to replace the sprocket and bar after every two or three chains for even wear.
🌦️ Storing and Caring for Your Chain
If you only use your saw seasonally (like many gardeners or homeowners), proper storage matters.
- Clean the chain thoroughly — remove oil and debris.
- Lightly coat with chain oil to prevent rust.
- Store in a dry, covered box — not in direct sunlight or moisture.
- Label your sharpened chains so you know which ones are ready to use.
Proper storage keeps your tools reliable when you need them most.
🪚 Sharpening FAQ (Quick Answers)
1. Can I sharpen my chain while it’s still on the saw?
Yes, and most people do. Just ensure the saw is stable and the chain can rotate freely.
2. How long does sharpening take?
About 10–15 minutes for a touch-up, or 30 minutes if it’s very dull.
3. Do I need to remove the chain first?
Not for manual sharpening — only if using a bench grinder.
4. Can I over-sharpen a chain?
Yes. Filing too much metal shortens its life and changes cutting angles. Take off just enough to restore the edge.
5. Should I lubricate before sharpening?
No. Clean and dry first, then oil afterward.
🌳 Practice Makes Perfect
Sharpening a chainsaw chain can feel intimidating at first, but it’s mostly about rhythm and consistency. After a few tries, you’ll start to recognize the feel of sharp versus dull teeth, and your cuts will become noticeably smoother.
The more you maintain your own tools, the more confident and independent you’ll feel — whether you’re trimming storm damage, pruning your orchard, or cutting firewood for winter.